Creating Menus with Godot 4
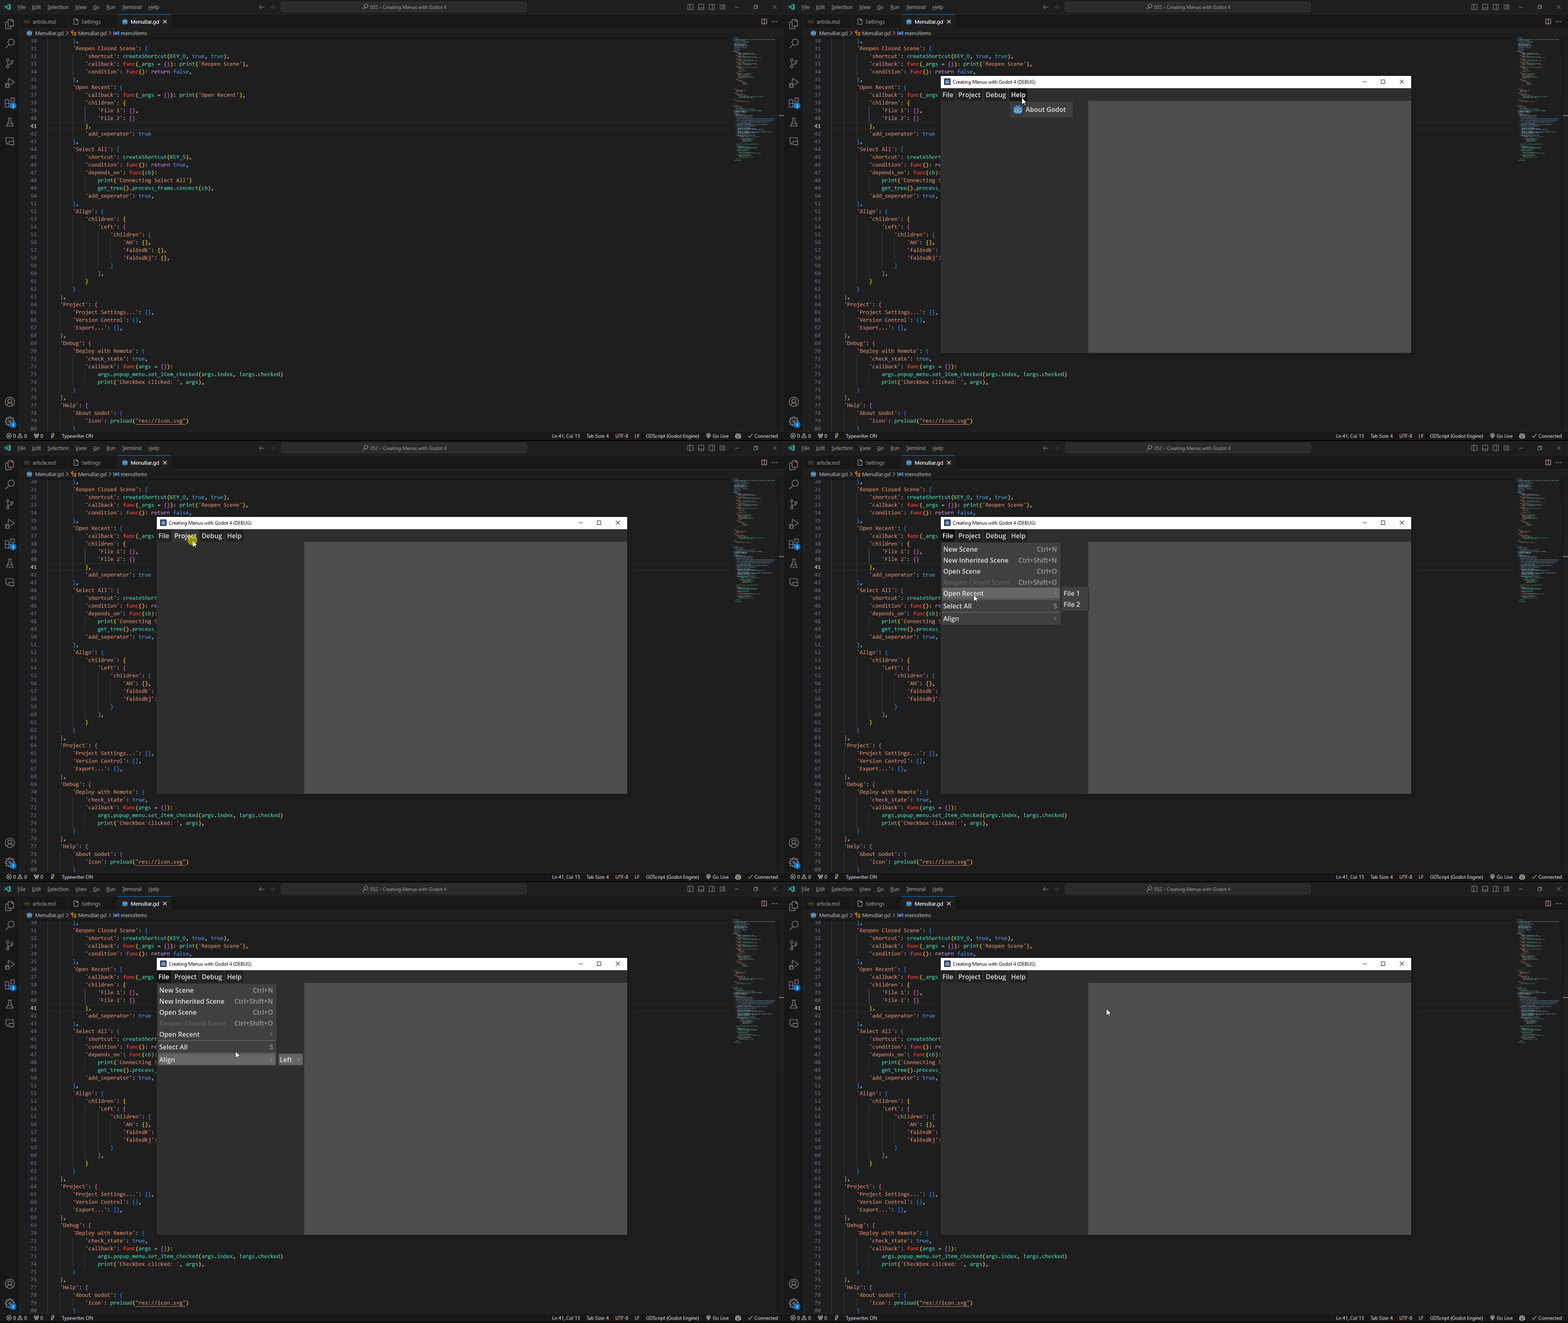
In this tutorial I want to teach you how to make menus in Godot 4. I will do this by building a dynamic system where we can add menu items to a structured dictionary and a function will build the menu accordingly. This structured Dictionary will support the following features: Name, Tooltip, Shortcut, Condition, Callback, Children. The menu will be built using the PopupMenu node and the createSubmenu function will be the heart of this whole program.
¶Menu dictionary structure
Let’s first go over the structure of the dictionary defining the menu.
As you see each key is the name of the menu and its value is another dictionary with the configuration for the given menu item. Actually every config key is optional. We could even add a children key in order to create a submenu.
extends MenuBar

var menuItems = {
	'File': {
		'New Scene': {
			'shortcut': createShortcut(KEY_N, true),
			'callback': func(args = {}): print('New Scene'),
		},
		'New Inherited Scene': {
			'shortcut': createShortcut(KEY_N, true, true),
			'callback': func(args = {}): print('New Inherited Scene'),
		},
		'Open Scene': {
			'shortcut': createShortcut(KEY_O, true),
			'callback': func(args = {}): print('Open Scene'),
		},
		'Reopen Closed Scene': {
			'shortcut': createShortcut(KEY_O, true, true),
			'callback': func(args = {}): print('Reopen Scene'),
			'condition': func(): return false,
		},
        'Recent': {
            'children': {
                'File 1': {},
                'File 2': {},
                'File 3': {},
            }
        }
    },
    'More Top Level Keys ...': {
		'Align': {
			'children': {
				'Left': {
					'children': {
						'AH': {},
						'falösdk': {},
						'falösdkj': {},
					}
				},
			}
		}
	}
}
Let’s go over the different keys and their purpose.
-
name: The name of the menu item, (The Key of the dictionary) -
tooltip: The tooltip of the menu item -
shortcut: The shortcut of the menu item -
condition: A function that returns a boolean, if the function returns false the menu item will be disabled -
depends_on: A function that receives the condition function in order to connect it to events that should retrigger the condition function -
callback: A function that will be called when the menu item is clicked -
children: A dictionary of menu items that will be added as a submenu -
separator: A boolean that will add a separator after the menu item -
check_state: A boolean that will make the menu item checkable and set its state -
icon: A texture that will be used as the icon for the menu item -
icon_max_width: A number that will be used to set the max width of the icon
Take a look at the full example in the Showcase section and in the Github Repository.
¶createSubmenu function
The createSubmenu function is the heart of this whole program. This function will take in the name and the data for a submenu and create the items accordingly.
We start by creating a new PopupMenu node and settings its name, this is important for two reasons. First: Top Level PopupMenus derive their visible name from the node name like Tabs do. Second submenus are also identified over their name so we can use this to find the submenu we want to add items to.
func createSubmenu(submenu_name: String, data: Dictionary) -> PopupMenu:
	var popup_menu = PopupMenu.new()
	popup_menu.name = submenu_name
Then we continue by looping over the data dictionary and creating the menu items. We need the index variable because most methods of the the popup menu need a number to insert or edit an item.
	var index = 0
	for menu_item_name in data:
		var menu_item_data = data[menu_item_name]

		...
After that we will add the item to the PopupMenu.
popup_menu.add_item(menu_item_name, index)
Then we set all the optional things that can be configured for each menu item like the shortcut, tooltip, icon, icon_max_width. As you see there are a bunch of methods to change existing popup menu items and we always need the index.
		if 'shortcut' in menu_item_data: popup_menu.set_item_shortcut(index, menu_item_data['shortcut'])

		if 'tooltip' in menu_item_data: popup_menu.set_item_tooltip(index, menu_item_data['tooltip'])

		if 'icon' in menu_item_data: popup_menu.set_item_icon(index, menu_item_data['icon'])

		if 'icon_max_width' in menu_item_data:
			popup_menu.set_item_icon_max_width(index, menu_item_data['icon_max_width'])
		else:
			popup_menu.set_item_icon_max_width(index, 30)

		if 'check_state' in menu_item_data:
			popup_menu.set_item_as_checkable(index, true)
			popup_menu.set_item_checked(index, menu_item_data['check_state'])
Continuing we add a submenu in case the children property has been set. Here we can use the createSubmenu function again to create a submenu recursively.
In order to create and connect submenus to an item we need to know the name of the submenu.
		if 'children' in menu_item_data:
			var submenu = createSubmenu(menu_item_name + '_sub-menu', menu_item_data['children'])
			popup_menu.set_item_submenu(index, submenu.name)
			popup_menu.add_child(submenu)
Then we connect the callback function to the menu item, we also pass some information that could come in useful like the popup menu the index of the item and the checked state.
		var index_pressed_callback = func(pressed_index):
			if pressed_index == index:
				var isChecked = popup_menu.is_item_checked(index)

				if 'callback' in menu_item_data:
					menu_item_data['callback'].call({
						'checked': isChecked,
						'popup_menu': popup_menu,
						'index': index
					})

		popup_menu.index_pressed.connect(index_pressed_callback)
After that we also connect the condition and depends_on functions if they have been set. The condition function will be called once and the depends_on function will connect the condition function to any event.
We run the condition function once to set the initial state of the item.
		var dependant_callback = func():
			var isEnabled = menu_item_data['condition'].call()
			popup_menu.set_item_disabled(index, !isEnabled)

		if 'condition' in menu_item_data:
			dependant_callback.call()

			if 'depends_on' in menu_item_data:
				menu_item_data['depends_on'].call(dependant_callback)
Lastyl we add a separator if the add_separator key has been set to true.
We will have to increase the index because the separator will be added after the item and also count as an item.
		if 'add_seperator' in menu_item_data:
			if menu_item_data['add_seperator']:
				index += 1
				popup_menu.add_separator('', index)

		index += 1

	return popup_menu
Also dont forget to loop over each top level item in the ready function to create the menu.
func _ready():
	for menu in menuItems:
		add_child(createSubmenu(menu, menuItems[menu]))
¶createShortcut helper function
Let’s also quickly go over the createShortcut helper function which can be used in the the menuItems variable to assign Keyboard Shortcuts to the menu items. Normally we would have to go through several hoops to create a shortcut and this function simplifies that. It take a mandatory key variable and optionally booleans for the ctrl, shift and alt modifiers, by default these are set to false so if we want to assign a single letter as a shortcut we dont have to do as much.
Shortcuts consist of a list of InputEventKey‘s
func createShortcut(letter: Key, ctrl: bool = false, shift: bool = false, alt: bool = false)-> Shortcut:
	var shortcut = Shortcut.new()

	var input_event = InputEventKey.new()

	input_event.keycode = letter
	input_event.ctrl_pressed = ctrl
	input_event.shift_pressed = shift
	input_event.alt_pressed = alt

	shortcut.events = [ input_event ]

	return shortcut
¶Showcase

So thats it! I hope that you now have an Idea on how to create Menus in Godot 4. You can also extend this system to support features that you need.


