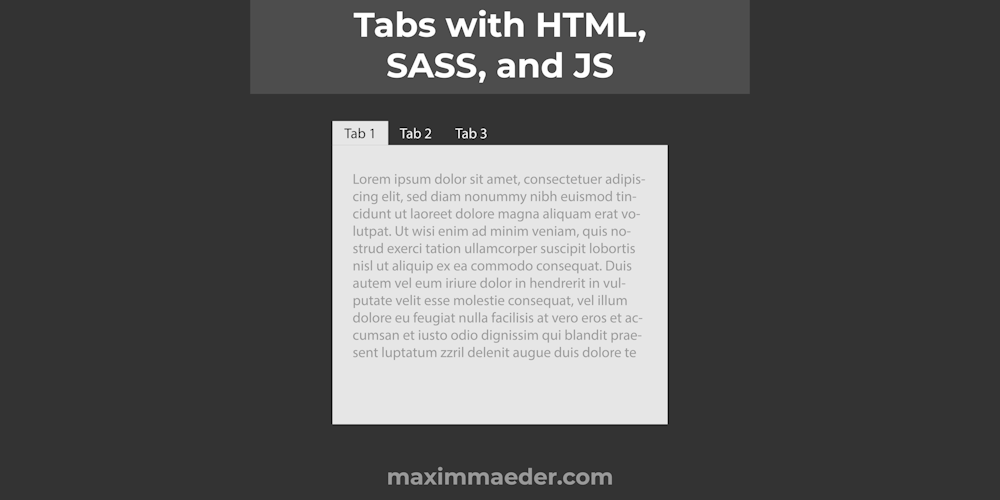
Tabs with HTML, SASS, and JS
This Tutorial will make functional tabs with HTML, SASS, and JavaScript. We will make it so you can add the CSS and js file to the page and apply some classes to nested divs for it to work. We will also try to make it semantically correct by adding ARIA Attributes to the formal elements. However, don’t take this too seriously because I am unsure if I did it correctly. Still, it is always essential to give your HTML meaning.
Either way, Let us get started!
¶HTML of the Tabs
The Potential structure of such tabs could look something like this. We first would have a div with the class tabs and then two divs inside, one with the class tab-registers and one with the class tab-bodies. The First button inside tab-register is connected to the first item in the tab-bodies element. We can optionally give one of the buttons the class active-tab so it starts as the active tab.
<div class="tabs">
    <div class="tab-registers">
        <button>Tab 1</button>
        <button>Tab 2</button>
        <button>Tab 2</button>
    </div>
    <div class="tab-bodies">
        <div>
			...
        </div>
        <div>
			...
        </div>
        <div>
            ...
        </div>
    </div>
</div>
¶JavaScript of the Tabs
We start by getting an HTML collection of all elements with the tabs class, and we loop over it after we have turned it into a list using Array. from(list_like). The call back for the loop takes the element itself and the Index. We will need the Index to identify this tab group uniquely.
Array.from(document.querySelectorAll('.tabs')).forEach((tab_container, TabID) => {
    ...
})
Then we save some of the essential elements to variables, namely the tabs-registers and tab-bodies elements.
    const registers = tab_container.querySelector('.tab-registers');
    const bodies = tab_container.querySelector('.tab-bodies');
Continuing, we get the active register, but because it could be undefined, we set it to the first button if that’s the case. Either way, we add the class active-tab to the element.
    let activeRegister = registers.querySelector('.active-tab');
    activeRegister = activeRegister ? activeRegister : registers.children[0]
    activeRegister.classList.add('active-tab')
After that, we call the changeBody() function, which will, as it says, hide all bodies except the one corresponding to the current register/tab. We also call this function every time the tab is changed.
changeBody()
Now we also loop over all the elements directly inside the registers container. These are the buttons/Tabs. We then set the aria-controls attribute, which says what other element is controlled by this one. We also have to set an id for the corresponding body. We use the tab id and the Index of the tab button to build a unique id.
Then we add an event listener to the button, remove the active tab class from the current register, and replace the content of the variable with the new current register, so we also need to add the active tab class. Last, we call the changeBody() function.
    Array.from(registers.children).forEach((el, i) => {
        el.setAttribute('aria-controls', `${TabID}_${i}`)
        bodies.children[i]?.setAttribute('id', `${TabID}_${i}`)

        el.addEventListener('click', (ev) => {
            activeRegister.classList.remove('active-tab')
            activeRegister = el;
            activeRegister.classList.add('active-tab')
            changeBody()
        })
    })
Now to the changeBody() function. In it, we once again loop over the registers children. We also get the Index of each iteration. Then if the body at that Index exists, we decide whether its display property is block or none depending on the current register. We do this check so there can be more registers than bodies. Then we also set the aria-expanded attribute for the button, which tells the user if the content of this panel or button that leads to a panel is expanded or not.
function changeBody() {
        Array.from(registers.children).forEach((el, i) => {
            if (bodies.children[i]) {
                bodies.children[i].style.display = el == activeRegister ? 'block' : 'none'
            }

            el.setAttribute('aria-expanded', el == activeRegister ? 'true' : 'false')
        })
    }
¶Sass of the Tabs
Below you see the sass/CSS code of the program. We won’t go into detail.
.tabs
    font-family: 'Lucida Sans', sans-serif
    font-size: 20px


    .tab-registers
        display: flex
        background-color: RGB(255, 255, 255)


    button
        padding: 0.5em
        background-color: RGB(255, 255, 255)
        border: none
        font: inherit


    .tab-registers button:hover
        cursor: pointer


    .tab-bodies
        padding: 0.5em
        background-color: RGB(235, 235, 235)
        flex-grow: 1
        overflow-y: auto


    button.active-tab
            background-color: rgb(235, 235, 235)
¶Showcase
¶Conclusion
Excellent! You have successfully created functional tabs using! See how you can add more features to this program, such as dynamically adding and deleting tabs.
Keep in mind that I am also just a beginner, so it could be that my way of solving these problems is not the best or that I use functions or features that aren’t advised. Always ask questions and try to solve problems your way!


casino
Nice blog here! Also your website loads up very fast! What web host are you using? Can I get your affiliate link to your host? I wish my site loaded up as quickly as yours lol
Maxim
Thanks it's hostpoint.ch
Kostum Sepeda
Hello There. I discovered your weblog using msn. That is an extremely smartly written article. I will make sure to bookmark it and return to read extra of your useful information. Thanks for the post. I will definitely comeback.
food video blogs
I haven't checked in here for a while because I thought it was getting boring, but the last several posts are great quality so I guess I will add you back to my everyday bloglist. You deserve it my friend :)