Split Container Web Component
Not long ago I learned that it’s possible that one can make custom HTML elements with JavaScript. So today I want to make a resizeable split container with you, to learn how to make custom web components. Keep in mind that I also did this for the first time and I am just a beginner who documents what he learns, so come along!
Let’s do this!
¶Class
Now how exactly does one make a custom HTML Element? Its really easy we just have to make a class that extends HTMLElement or any other Predefined Element and we have to add this class to the custom elements with:
customElements.define('hsplit-container', splitContainer)
The first argument here is the name that will be used in the HTML and the second one is the class. Now inside this class, we can have several functions that will be called by the browser in the lifetime of the element. The one we use here is connnectedCallback which is called when the element is created. Most of the Script happens here so let’s go over it.
¶Connected Function
So inside our split container class, we define a function to handle setting everything up. So we start by getting attributes from the element itself and storing them inside an object called config. in this case this refers to the element so we can access and edit properties like innerHTML like normally. Normally || is used to check if either of two conditions is true but actually, it returns the first value that is true. So we can use this syntax to easily create a default value for each attribute because if it was not set getAttribute will return null.
class splitContainer extends HTMLElement {
	connectedCallback() {
		this.config = {
            min: this.getAttribute('min') || 20,
            max: this.getAttribute('max') || 80,
            start: this.getAttribute('start') || 50,
            draggerwidth: this.getAttribute('draggerwidth') || 50,
        }
	}
	...
}
¶Shadow DOM and Templates
Next up we create a shadow DOM which is just HTML normally hidden that is used when a component needs many elements or a restructure of given elements. We make this shadow DOM with the attachShadow() function that returns an object that also has the same the same properties as a normal HTML Element.
Inside there we can define styles slots and other elements.
const shadow = this.attachShadow({ mode: 'open' })
shadow.innerHTML = `...`
The first thing we insert into the shadow DOM is the custom HTML in our case this is a slot element followed by a div with another div as a child and in the end another slot.
<slot name="first"></slot>
<div id="dragger-container">
    <div></div>
</div>
<slot name="second"></slot>
...
The divs in the middle will represent the dragger. The slots are used to rearrange elements in the original Structure to fit our needs. The Markup will look something like this, where we have the root custom element with two children representing the two sides of the split. But we want to insert dragger in between and that’s why we use the shadow DOM. The Developer Tools normally don’t show shadow elements so this has to be enabled.
<hsplit-container>
    <div>
        Left Side
    </div>
    <div>
        Right Side
    </div>
</hsplit-container>
The First slot element will have the first element inside the hsplit-container and the second will have the second.
We later also go over the CSS that is also inserted into this shadow dom so keep that in mind.
Continuing we search for the dragger inside the shadow element and we save the reference. We then set its width according to the config object. But then we get the actual width in pixel with the el.getBoundingClientRect() function that return box informations about any element. We will use these functions often in this Tutorial. Last but not least we define a variable that is used to tell if the dragger has been clicked or relased.
// Getting the Dragger
this.dragger = shadow.querySelector('#dragger-container')
this.dragger.style.width = this.config.draggerwidth + 'px'

this.config.draggerwidth = this.dragger.getBoundingClientRect().width
this.draggerClicked = false
Then we also save the two nested elements that are split to variables and we set the slot attribute for each of them so the are rearranged properly.
// Get the two children
this.firstEl = this.children[0]
this.lastEl = this.children[1]

// the Slot Attribute for both Elements
this.firstEl.setAttribute('slot', 'first')
this.lastEl.setAttribute('slot', 'second')
Then we connect some events to some functions. For the Drag we want it to work so the user has to press on the dragger but can then leave it to drag it along. That is why we set the pointerdown (Click) to the dragger but pointerup and pointermove to the document. For the movement we call a function called moveCallback, we will go over it later.
this.dragger.addEventListener('pointerdown', (ev) => { this.draggerClicked = true; })
document.addEventListener('pointerup', () => { this.draggerClicked = false; })
document.addEventListener('pointermove', (ev) => { this.moveCallback(ev) }
¶Movement Callback
Let’s go over the function that handles movement. In it, we first check if the dragger is clicked if that’s not the case we return essentially doing nothing.
moveCallback(ev) {
	if (!this.draggerClicked) return

	...
}
If that is the case we continue by saving the x position and width to variables and we use this info and the x position of the click to calculate how far to the left inside the element the mouse pointer is currently in percent. We then also clamp this value to the max and min width.
        const x = this.getBoundingClientRect().x
        const width = this.getBoundingClientRect().width

        // Calcualate
        const perc = ((ev.x - x) / width) * 100
        const percClamped = this.clamp(perc, this.config.min, this.config.max)
We define this function somewhere in the class, and it looks like this.
clamp(val, min, max) {
    if (val > max) return max
    if (val < min) return min
    return val
}
Anyway, we then continue by setting the width for both inserted elements and the left property for the dragger. To do this we use the calc function in CSS and we need to make adjustments so the dragger is placed so its middle is at the mouse position and so on.
this.dragger.style.left = `calc(${percClamped}% - ${this.config.draggerwidth / 2}px)`
this.firstEl.style.width = `calc(${percClamped}% - ${this.config.draggerwidth / 2}px)`
this.lastEl.style.width = `calc(${100 - percClamped}% - ${this.config.draggerwidth / 2}px)`
¶CSS
Let us also go over the CSS that is defined in the Shadow DOM. I don’t want to go into detail that much, I just want to point out a few things. We can select the element itself. with :host and slotted styles are made within::slotted(selector). We need to set the position to absolute and right to zero for the second div so it’s on the right side.
:host * {
    box-sizing: border-box;
}

:host {
    background-color: rgb(255, 255, 255);
    font-family: 'Segoe UI', sans-serif;
    display: flex;
    position: relative;
}

::slotted(div) {
    box-sizing: border-box;
}

::slotted(div:last-child) {
    position: absolute;
    right: 0
}


#dragger-container {
    height: 100%;
    width: 100px;
    display: flex;
    align-content: center;
    justify-content: center;
    opacity: 0.1;
    left: calc(50% - 1em - 2.5px);
    transition: opacity 0.2s ease;
    position: absolute;
    touch-action: none;
}

#dragger-container:hover {
    opacity: 0.3;
    cursor: ew-resize;
}

#dragger-container:active {
    opacity: 1;
    cursor: ew-resize;
}


#dragger-container div {
    background-color: rgb(0, 149, 255);
    width: 5px;
    height: 100%;
    border-radius: 99px;
    transition: width 0.2s ease
}

#dragger-container:active div {
    width: 10px;
}
¶HTML Usage
Now that we have the code we can use the element in our HTML with its custom name like this.
<hsplit-container>
	<div>
		Content
    </div>
    <div>
        Content
    </div>
</hsplit-container>
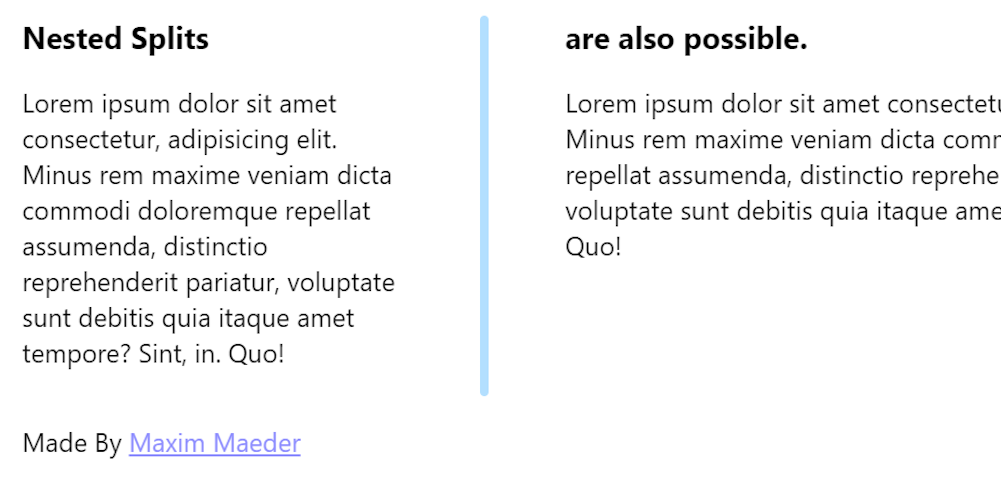
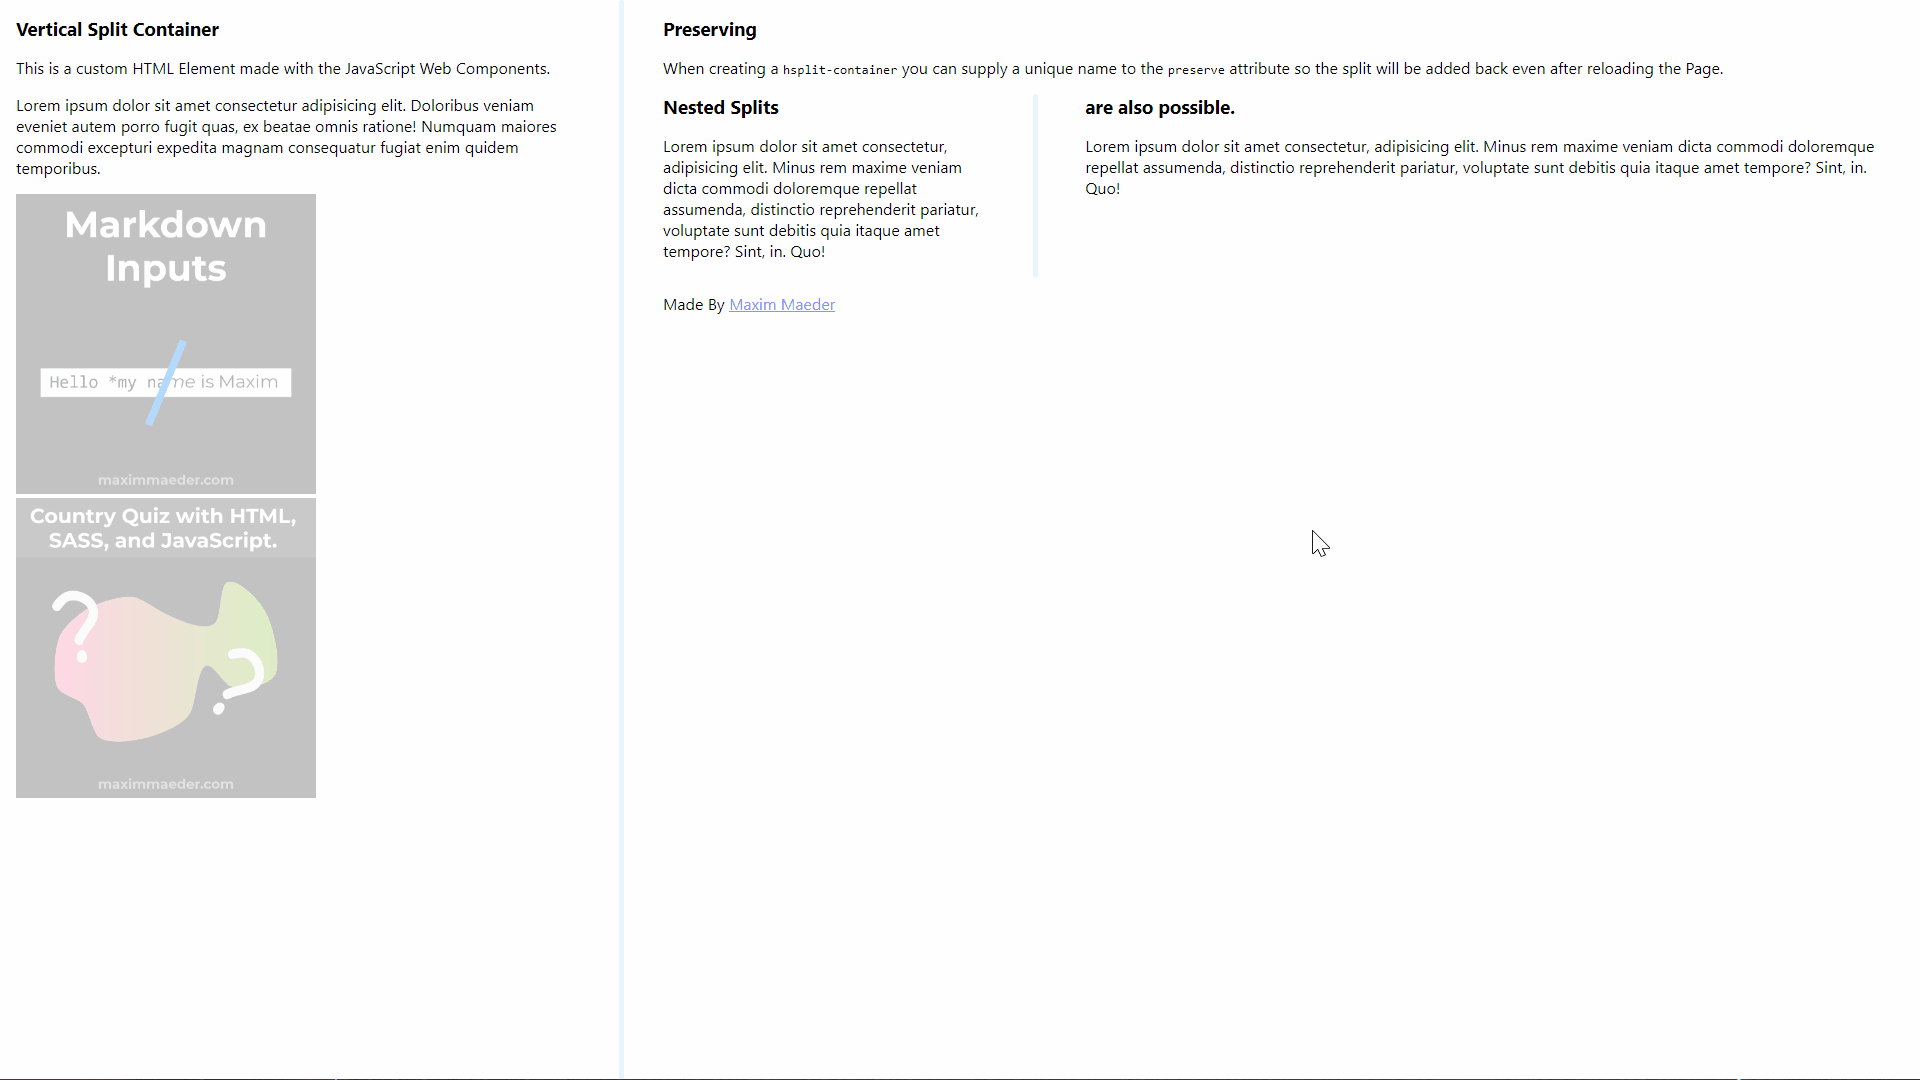
¶Showcase
¶Conclusion
Awesome! We have created a custom HTML Element with JavaScript now how could we use this newly gained knowledge?
Keep in mind that I am also just a beginner, so it could be that my way of solving these problems is not the best or that I use functions or features that aren’t advised to use. Always ask questions and try to solve problems your way!


Leave a Reply